DIY Small Greenhouse
Easy DIY Small Greenhouse: How to build an indoor greenhouse to start seeds, grow vegetables or grow tropical plants indoors.
You can get an early start on your planting season by starting your seeds indoors and then transplant them at the last sign of frost or extend your planting season by a month or two by moving container plants indoors during the cold season like fall and winter. You can also use to small greenhouse to grow tropical plants indoors.
The main reason why I build this indoor greenhouse is continue to grow my vegetables in the winter. These are delicate plant that I know I will not have the seeds for next year’s grow season so I decide to save the plants and grow them indoors until spring where I will use cuttings from their stems to start new plants.
I did not buy all the wood I used in this project some of the wood I got them at 70% off at Home Depot and Lowes. You can find out how you can get cheap lumber at Home Depot and Lowes your projects at one of my post here.
Do it Your self Small Greenhouse
What you will need
Lumber: You can use 2 x 2 or 2 x 4
4 = 72 inches posts
37 inches wood x 8 for 4 shelves frames
37 inches wood x 10 for shelves (middle of the shelf. 3 on each of the bottom shelves and 1 on the top shelf)
8 = 20 inches for the sides that support the shelves
Screws you can use 8 x 3 or 8 x 2.5 inch Deck Screw, Mechanical Galvanized 
pencil and tape for measurement
wood protector: I used Thompson’s WaterSeal Waterproofer Plus Wood spray for mostly the shelves
grow lights and heater where necessary
Electric timer so You don’t have to worry about turning the grow lights on and off  everyday
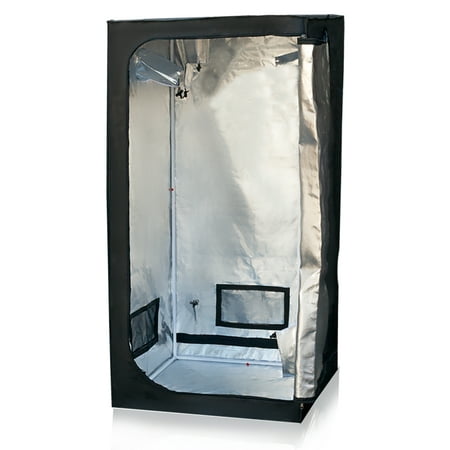
If you do not want to build what I just did, you can buys a Grow Tent Reflective Mylar as seen in the picture below or check out my blog where I made one with a 5 tier Plastic shelf.

Put together 2 of 72 inches posts and 4 of the 37 2 x 2 to create this

do the same for the second one = 2 of 72 inches posts and 4 of the 37 2 x 2 and put them together as shown on the picture..

cut the 20 inch pieces for the shelf support

attach the two frames together with the 20 inch shelf support as shown. make sure both sides have the same dimension for the 20 inch shelves.

After putting both sides up this is how it looks

The next thing to do is to put the remaining 37 inch wood on all the shelves. Spray the Shelves with Thompson’s WaterSeal Waterproofer Plus Wood spray . this will protect the wood from water damage. I also sprayed the bottom part of the greenhouse that will be touching the ground.

everything is done. All left to do is cover it. before you cover it, move the small greenhouse to the location it will be stationed and add you power strip to one of the sides or shelf and attach it to it and then add and the 24hr Timer to your power strip.

Now just get a Window Insulation Kit and put the double sided tape on all the 3 major corners s of the unit except the front. and then cover the sides that have double sided tape with Window Insulation plastic from the Window Insulation Kit .

Cheap 100 w led bulbs at Walmart

Clamp light and 100 w led bulb from Walmart


after covering all 3 sides, put double sided tape on the left side of the front frame and put start putting plastic on that side. that side will serve as a hinge to open and close the greenhouse. make sure the plastic over lapse the front side of the unit so that it is seal. around the right side where the plastic over lapse to put 3 or 4 Velcros to help seal and hold the plastic that covers the door in place.
Inside the small greenhouse I have added my my grow lights to the timer on the power strip and attach the grow light to the top of the middle wood so that the light covers the whole shelf.
Leave a Comment Below and Tell us What You Think…


 Window insulation kit


